OneDrive is Microsoft’s cloud storage service. Rather than store files on computer hard drives, or portable tools such as discs and flash drives, OneDrive cloud storage uses Microsoft’s secure servers to house data. Using cloud storage allows you to work on, save, and retrieve your files from different devices—for example a laptop, smartphone—or any place you log in to your OneDrive account.
Save your file
Office applications offer two ways to save your file to OneDrive. One way is to enable AutoSave, and the other is to manually save your file.
1. Enable AutoSave

The simplest way is to toggle the AutoSave button to “On.”
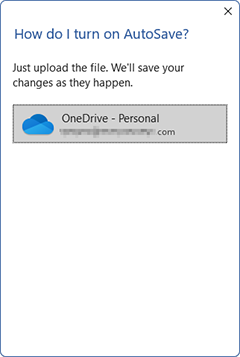
When the dialogue box appears, click the shaded OneDrive bar.
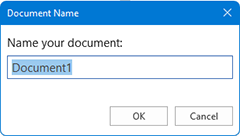
A smaller dialog will then appear allowing you to name your file.

Your file is now saved to OneDrive.
2. Manual save

You may also save by clicking the Save icon or pressing Ctrl + S. Inputting a manual save command brings up a different dialogue box than toggling AutoSave.
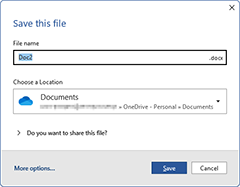
In the “Save this file” box you name your file first (or accept the suggested name) and then choose a location. Select a OneDrive folder, such as “Documents,” from the location dropdown menu. A cloud icon indicates a folder is stored in OneDrive.

Your file is now saved to OneDrive.
1. Enable AutoSave
The simplest way is to toggle the AutoSave button to “On.”

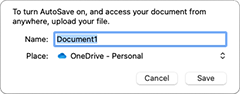
A dialog box appears allowing you to name your file before uploading it to OneDrive. The dropdown below the filename indicates that the file will be saved to OneDrive. After you‘ve entered a name for the file, click Save.
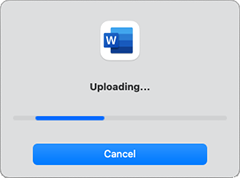
A new dialog will appear letting you know that your file is being uploaded. This dialog will close automatically once the upload is finished.
Your file is now saved to OneDrive.

2. Manual save
You may also save by clicking the Save icon or pressing Cmd + S. The save button is the icon between the house-shaped icon and the arrow that curves to the left. Inputting a manual save command brings up a different dialogue box than toggling AutoSave.

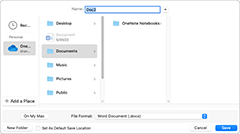
In the save file dialog box, you name your file first (or accept the suggested name) and then choose a location. Select a OneDrive folder, such as “Documents,” from the folder columns. Finally, click the Save button in the lower right corner to save your file.
Your file is now saved to OneDrive.
Saving your file to OneDrive enables AutoSave
Current versions of Word, Excel, and PowerPoint default to AutoSave when documents are saved to OneDrive, preserving changes made to your file every few seconds. With AutoSave, you no longer need to manually save your work; AutoSave saves it for you.
Icons above the ribbon display AutoSave’s status. The title of your file appears with real time updates indicating that AutoSave is actively “Saving,” or that all recent changes are “Saved.” Selecting the disc icon will save your file instantly, but this is not necessary — with AutoSave, your file is saved automatically as you work.
Saving files to OneDrive and enabling AutoSave allows you to create and edit your files with confidence. With AutoSave you no longer need to disrupt content creation processes by stopping to save changes. By using OneDrive, your files will be available for you and your collaborators to access on virtually any device.